OPTIKA B-510DK Dark Field Microscope Support
On this support site you will find our video guides and the answers to the frequently asked questions of our customers. This service is intended primarily for customers who could not take advantage of our installation/training service because of the geographical distance. It shall help to achieve a smooth installation and a fast start-up. Please take the time to read these instructions carefully before setting up or commissioning the equipment.
Please notice that the information on this page does not replace the manufacturer's documentation and is not part of the manufacturer's scope of supply. You can click here to download the official OPTIKA B-510DK User Guide (pdf). You can download this user guide also direct from OPTIKA's website www.optikamicroscopes.com
Microscope and camera assembly
1. STEP - HOW TO ASSEMBLE THE MICROSCOPE
The microscope has been delivered "disassembled" as shown below in order to avoid damage during transportation. Please take out of the carton the two white styrofoam boxes. Then take out of them the microscope parts and especially the allen key depicted below with the red arrow as you will need it for assembly.
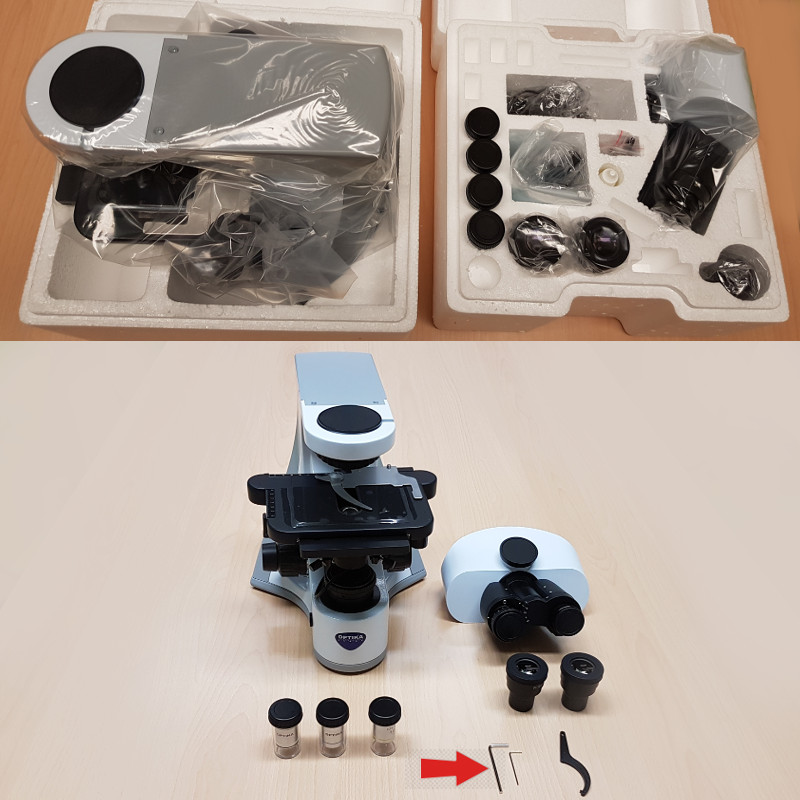
A step-by-step video guide for assembling the microscope and then connecting it with a microscope camera can be found below
2. STEP - ADGUSTMENT OF EYEPIECE AND CAMERA IMAGE
The focus ring (see red arrow below) has an important function. Its integrated optics helps you focussing the image directed to the camera. With the right setting, you achieve a sharp image at the same time both on the screen and through the eyepieces - without having to readjust with the fine course each time.
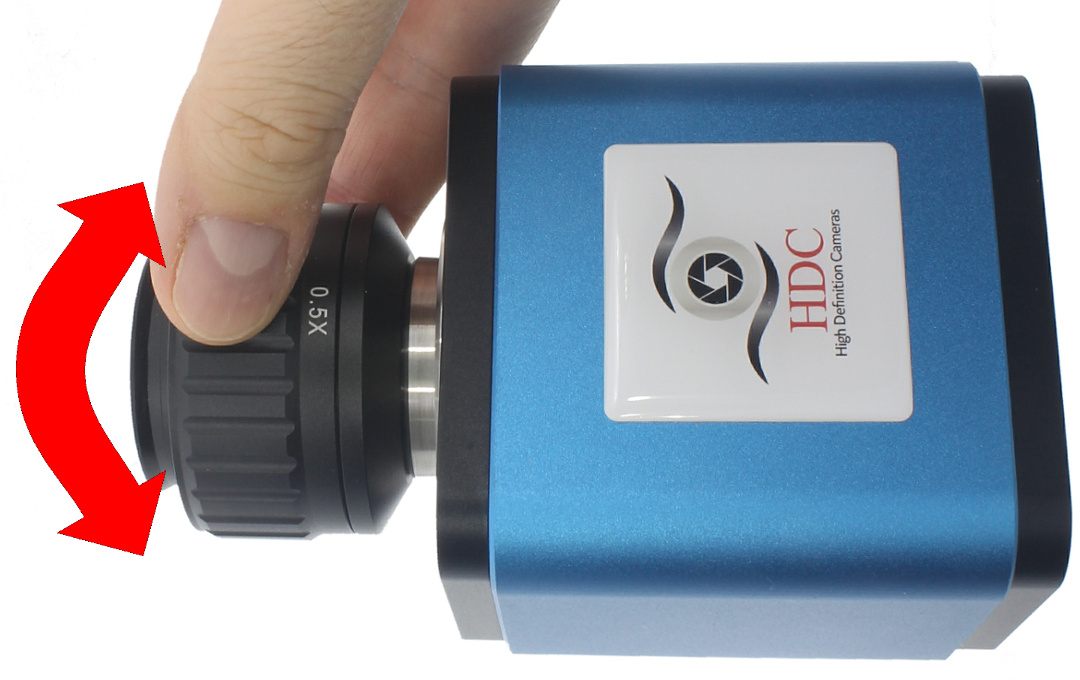
Adjustment procedure: First look only through the eyepieces and focus the eyepiece image with the fine course of your microscope. Then look only at the screen and turn the focusing ring until you seee also a sharp image on the screen. Now both optical paths are adjusted and both images on screen and through eyepieces are sharp simultaneously.
Frequently Asked Questions
 In addition to the dark field condenser, the bright field condenser as shown is also part of the package. You do not need this condenser for the dark field usage. If you also want to use the microscope as a bright field microscope, you must remove the dark field condenser and mount this condenser.
Because every lens fits in every hole of the lens revolver, you could mount the lenses in any order. However, it is useful and practical to leave a space between the 40X and 100X lenses, so that you can easily apply the immersion oil on the cover glass when changing from 400X to 1000X. On the other hand, this prevents you from unintentionally stepping back from 1000X to 400X and contaminating the 40X dry lens with oil.
We recommend to connect only the following lenses for the dark field microscopy usage and the following lens order:
empty-10X-40X-empty-100X
In order to achieve an optimal image, you must calibrate the condenser before you use the dark field microscope. You will find on the condenser the following set of adjustement screws which helps you performing this process.
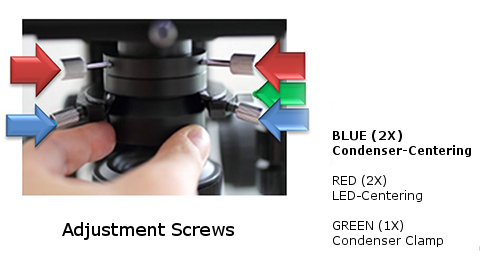
To calibrate the condenser, perform the following steps:
- Prepare a darkfield specimen - enclosed by specimen slide and cover glass.
- Turn the objective revolver so that no lens is hanging over the condenser and the 10X lens is hanging to the right of the condenser. Turn on the light of the condenser and apply a drop of immersion oil to the condenser.
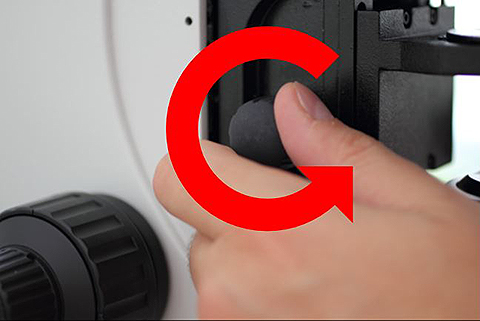
- Attach the specimen to the microscope table and drive up to the specimen until the distance between the condenser and specimen slide is approx. 1 mm and an oil film is formed between the condenser and specimen. The condenser can be raised by rotating the condenser drive shown on both sides. You will recognize a light flash at the connection between condenser and cover glass as soon as the oil film has been formed.
- Now turn the 10X dry lens into the optical path.
- Use the coarse and fine drive to adjust the distance between the lens and the specimen so that you can see the specimen sharply.
- As soon as you have obtained a sharp image, try to achieve a symmetrical and in the center illuminated image as shown below.
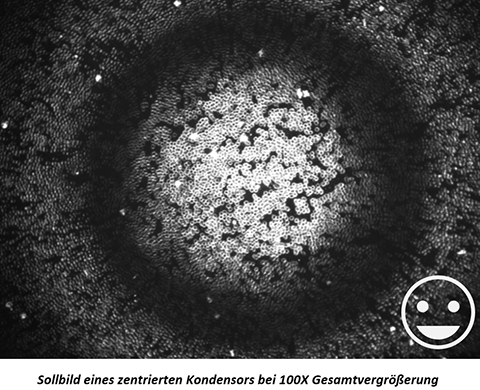
If the center of the circles is not in the middle of the field of view (not yet centered horizontally), use the condenser centering screws to move the center of the circles to the center of the image.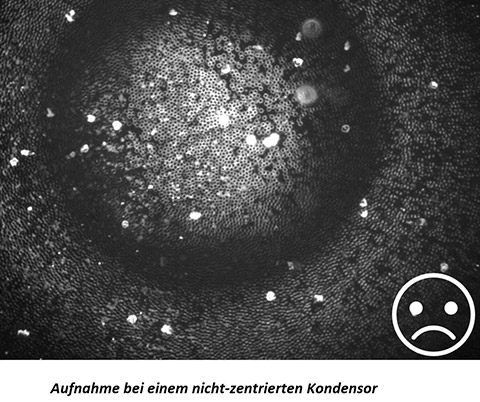
If your image is not illuminated in the center as appears in the image above (not centered vertically yet), slowly drive up and down the condenser using the condenser drive. Concentric circles become visible. Depending on the distance between condenser and specimen, the center of the inner circle will sometimes appear light (as above) and sometimes dark. The aim is to adjust the image as in the target image shown (usually at a distance of approx. 1 mm between condenser and specimen). - After reaching the target image at 100X, please switch to the 40X dry lens (total magnification 400X), focus with the fine coarse and continue to optimize the illumination. At 400X, you will not see the dark circles around the image center as in the picture above, because the entire field of view is now in the bright area of the figure above.
In order to work in the 1000X magnification, you must use the oil immersion on the 100X lens. The 100X lens is an oil immersion lens - all other lenses are dry lenses and shall not come in contact with oil. For the steps below, it is assumed that the condenser has already been centered (see previous sections).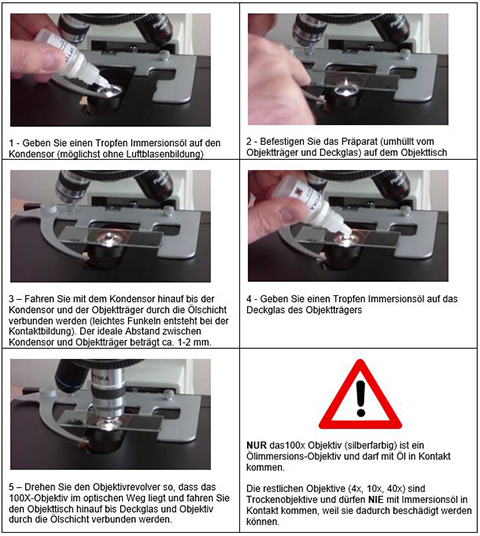
You can find here a video guide::
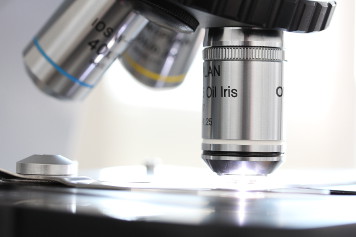
The 100X lens has an integrated iris diaphragm that controls the light flow. If your image looks as below in the left sub-image, then the iris aperture of the lens may be too wide open.
The iris diaphragm is realized as a rotatable metal ring, which you see in the middle part of the image. Depending on the lens series it can be also in the upper end of the lens. Please check the iris diaphragm position or close it slowly (by turning) and observe the image change.
If the iris diaphragm is correctly positioned, you will get a good contrast as in the right part of the image.
In case you need to remove the condenser, please ensure that its glass surface gets not scratched when removing the condenser. Another problem cause is the pulling the cable out of the microscope body. Pull the condenser cable by holding the fixed plastic part, not the cable!
We recommend to remove the condeser cable from the microscope body during device transportation.

After working with the microscope you should first clean it from the oil residue and then cover it with the enclosed dust cover. Cleaning material can be found in our webshop or in specialist stores. You need an immersion oil remover that is suitable for lenses and lint-free cleaning cloths for lenses. All surfaces that came into contact with oil have to be cleaned: the glass surface of the condenser and the 100X oil lens.
Condenser Cleaning : first wipe the bulk of the oil away from the condenser using a lint-free cleaning sheet. Then apply a drop of cleaning fluid to the condenser (in its center). Take a clean sheet and rub the condenser cyclically so that the cleaning fluid dissolves the remaining oil. Wipe the residue with a dry corner from the sheet.
Lens Cleaning : first wipe the bulk of the oil from the 100X oil lens with a sheet of lint-free cleaning sheet. Then apply a little cleaning liquid on a new sheet and gently rub it on the lens to dissolve the oil residue. Wipe the residue with a dry corner of the sheet.
Assistance and guarantee
We will be happy to help you with any questions or during warranty issues - you do not need to contact the manufacturer's technical support. Almost all questions and initial operating problems can be solved without involving the manufacturer. If you have any questions, please do not hesitate to contact us by e-mail (office@dunkelfeldmikroskop.eu) - pictures help very much understanding the problem. We reply usually within one working day and will contact you! In the case of a defect of a product (guarantee), please also contact us by e-mail (office@dunkelfeldmikroskop.eu) with the description of the problem and by stating your invoice number. We document the problem and report it to the manufacturer. Depending on the type of problem, we will inform you how to proceed and assist you with the processing. The guarantee conditions of the manufacturer apply.